Showing posts with label sewing. Show all posts

Monday, February 27, 2023

Custom-modifications to a gardening tool-belt pattern

Note: You can click on any image to see a bigger version.

Chris modeling his nearly-finished gardening belt.

    So, for Christmas (2022) I made shop aprons or tool-belts for my brothers and mom, using Spoonflower fabrics that reflected each person's interests.   It was a blast, and they were well-received.

    One of the patterns I used was the Helen's Closet Dogwood Apron from an indie-pattern designer. It looks like an apron that waitstaff might use, but it's designed for easy customization, for any activity where you might need a variety of different tools.  Note the cool pockets in the images below (I love pockets!). I thought it was a good candidate for gardening tools, so I offered to make one for my husband. Note: the pattern designer calls it an advanced-beginner pattern. I personally would call it an intermediate pattern - the welt pocket opening is a little tricky.

Image from the pattern designer.

Image from the pattern designer.

    Chris wasn't sure he'd wear or use a tool belt (no matter how well-designed it was) but he was willing to give it a go, as long as I understood he'd try it, but that he might not end up finding it useful.  I like a challenge, so I agreed.

    Right off the bat, I knew I wanted to modify the pattern: 

  • I used 2"  heavy-duty cotton webbing for the waistband instead of matching fabric.
  • I didn't bother with the snap loop, and moved U-shaped loop on the left, to the right.
  • I placed the buckle on one side at the hip, not in the middle of the back. Much easier to manage on one side. (I probably should have checked with Chris on that one - he finds a center-back buckle easier. If the belt proves useful, I'll pick out the stitches and re-attach it so the buckle is centered).
But what other changes should I make? His response:  "I want one big pocket in the middle for general use, one pocket for a gardening pen, one pocket for secateurs, and a way to attach my hori-hori."* Then he brought me all three items so that I could use them for sizing purposes.

So that meant the following changes:
  • I made the height of the bottom pocket band about 3/4" taller/deeper, so the gardening clippers (hopefully) couldn't fall out.
  • The bottom pocket band has only three pockets:  a narrow pen pocket with an adjusted bottom depth so it wouldn't slip too far down on the left side (his right when worn; he's right-handed).
  • A 2.5" wide pocket on the right side for the gardening shears. It's lined with faux leather so the blades wouldn't cut through the fabric (or stab my husband).  I also made the front of the holster slightly wider than the back, so when I sewed the edges together, the front bowed out a little, making it easy to drop the blades in without catching them on the fabric. I hand-sewed the edges of the holster/liner inside the pocket, so he couldn't accidentally insert the shears between the layers.
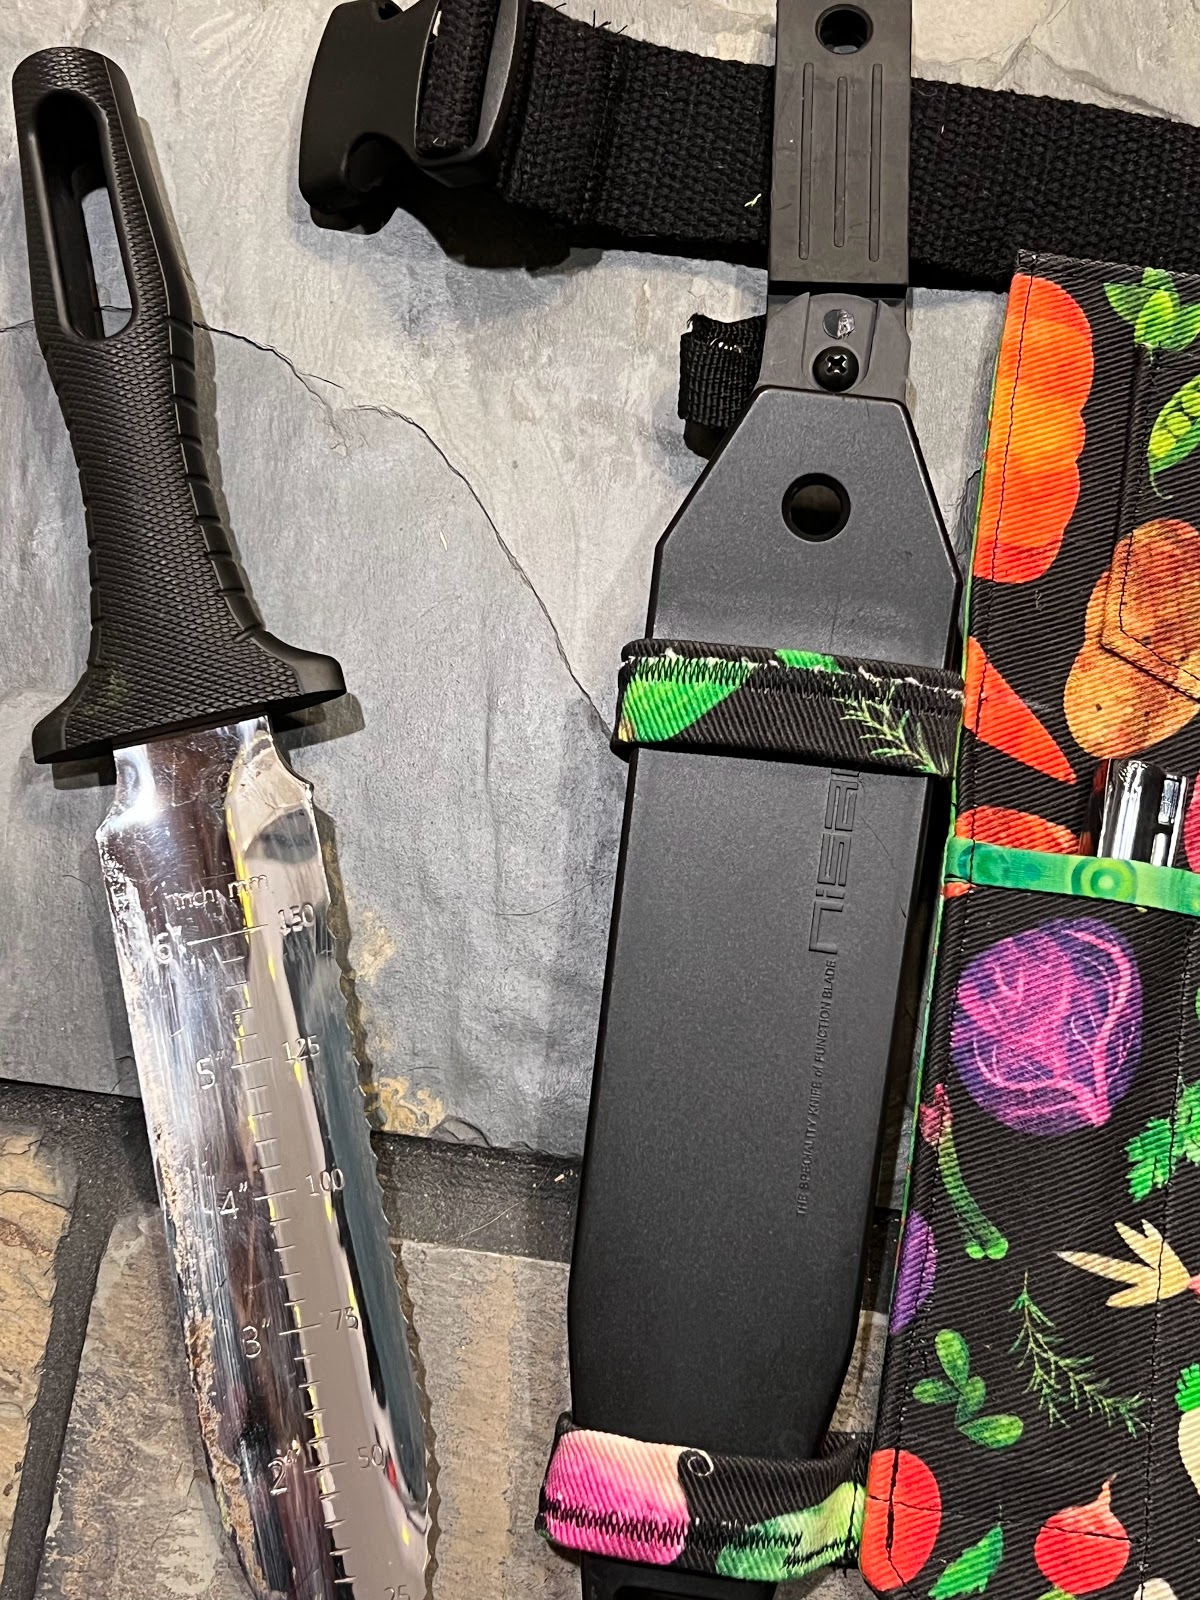
  • Loops or ties on the side to hold the hori-hori holster in place.  The spade comes with a hard-plastic sheath with an attached belt loop, so I simply hung the loop from the apron belt. The belt loop on the spade is about 2.5" wide, and the webbing and buckle are just small enough to slip through. So he can remove it and place it on another belt if he wants to.
I also had him pick the fabric he wanted from Spoonflower and a favorite was a rainbow of vegetables on a white background. The print came from an indie designer and I requested they add the same print but on a black background (so it wouldn't look instantly dirty), and they were happy to create that option. So I bought one yard printed on Spoonflower's heavy-denim fabric. I used tightly-woven cotton batiks as the lining and backing fabrics.  

Note: I washed and dried the denim three times once it arrived.  Denim is a "progressive shrinker" and to avoid it shrinking weirdly after the garment is made, you should wash/dry it at least 3 times (flannel is another fabric like that).

At first, I thought the hori-hori should have ties, as I thought ties were better to add flexibility, should he want to put something other than the hori-hori there.  But the fabric ties were stiff and hard to use:

Ties

    So, I removed them, and fashioned loops that are fitted to the hori-hori scabbard, and that worked much better:

Loops


Pen pocket and small
decorative pocket above.


Big middle pocket for general use.


Welt pocket flap

Hidden welt pocket

Secateur pocket lined with heavy-duty faux leather. 
I added the leather lining after the belt was constructed,
and should be easily replaceable if it wears through.


Belt as a whole

What I would do differently: the welt pocket should be much bigger. It's only a little wider than the flap, and 2-3 (?) inches shorter than the height of the apron itself.  I would make it 3-4" wider (or perhaps nearly as wide as the apron?) and extend down to the bottom edge of the apron body.

* For the non-gardeners: a gardening pen is like a Sharpie, but with UV-resistant ink, secateurs are gardening shears/clippers, and a hori-hori is a Japanese gardening spade/knife/soil-depth measurement tool.

Tuesday, September 13, 2022

Simplicity 1800: Amazing FitPattern Line - Slim, Standard, or Curvy shape?

 I came across the new (to me) AmazingFit Collection from Simplicity, and this dress caught my eye:


I also liked that on their online site, Simplicity showed the dress both on a skinny model (on the pattern envelope) and also on a more normal-sized model and I thought it looked good on both of them:


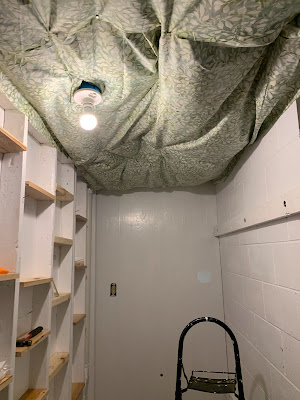
Kivi liked the pattern too, both for the cool neckline, and for the pockets, and she approved a lovely light-weight batik I had in my stash from a failed closet ceiling covering experiment.  


I hated, HATED the fabric in the ceiling of my closet.


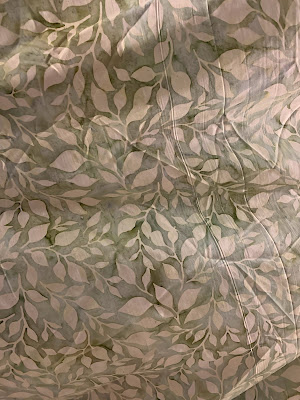
But, even thought the fabric failed to please me when it covered the ceiling of my fiber closet, it WAS a gorgeous fabric:


So, onward.  It's an unusual pattern in that it provided 4 different bodice pieces, for women with B, C, D, or DD busts.  It also gave very clear instructions on how to pick. Measure the bust as usual, and also high bust (the torso above the breasts, basically in the armpits). If the bust was 1-2" bigger than the upper bust, then use bodice B. If 2-3" bigger, then bodice C, and so on.

But it ALSO gave three different skirt back pieces, for a slim, average or curvy fit.  From the pattern envelope, it gave me finished garment measurements, but that just showed that the slim fit was 1/2" smaller than the average fit, and the curvy was 1/2" bigger than the average version.  The difference in circumference is fairly subtle; who's going to notice 1/2 - 1" difference in a skirt with more than 10" of ease. (I.e., the skirt is supposed to be 10" bigger around than the woman's hips.) I noticed one other thing - the curvy version had two darts on either side of the back zipper, whereas the average and slim had only one.  

But it gave ZERO guidance how to choose.  The fact that the curvy skirt had two darts instead of one, suggested it was for women with a bigger than average difference between hips and waist, but ... the lack of guidance felt like an oversight. Was it to fit differently? Or was it personal preference? Or was the skirt itself more or less full (no - I later verified that the skirts were the same circumference at the hem).

Turns out, it was an oversight.

I did some online research and I wasn't the only person befuddled by the omission, so I contacted Simplicity's customer service, and we managed to talk past each other for awhile. They kept telling me to refer to the pattern envelope and the sizing there, and I kept trying to reword my query so they'd understand and not jump to the wrong conclusion, and while that was happening, I posted about it on a sewing forum, and someone THERE found a discussion thread on a different sewing forum, and YES WE STRUCK GOLD.

In other AmazingFit patterns, the following blurb appeared:

DETERMINE CORRECT FIGURE TYPE Three separate pattern pieces have been given for the skirt back- slim, average and curvy fit. To determine which figure type you are, use the waist and hip measurements for the size pattern you have selected. Compare the difference of your hip measurement to the standard. If your hip measurement matches the standard or is within 1/2” (1.3cm) in either direction, then choose the Average pattern piece; if your hip measurement is 1/2” - 1-1/2” (1.3cm - 3.8cm) less than the standard choose the Slim pattern piece; if your hip measurement is 1/2” - 1-1/2” (1.3cm - 3.8cm) larger than the standard, choose the Curvy pattern piece.


Someone else paraphrased it:

  • Average: hip measurement is within 1"-1 1/2" (2.5-3.8cm) in either direction of standard
  • Slim: hip measurement is more than 1"-1 1/2" (2.5-3.8cm) less than standard
  • Curvy: hip measurement is more than 1"-1 1/2" (2.5-3.8cm) larger than standard


I immediately shot off another email to Simplicity asking if this guidance holds true for this pattern as well. I got a quick response that they were checking with the design team and would get back to me.  I breathed a sigh of relief - that meant they'd finally understood the issue, and realized that I wasn't just another customer that hadn't RTFM.

Half an hour later, they emailed me again - yep, that is indeed the criteria I should use. The pattern was actually one of the very first in the AmazingFit line, and the criteria was added to later patterns.  (A not-so-private note to Simplicity: maybe consider publishing an errata and/or FAQ on your site for stuff like this?)

So onward. I'm making a size 18 (I do wish the pattern sizes matched retail sizing), D bust, slim-fit skirt.  Also, this page is a big help with sizing and it applies to all of their dress and top patterns:


Unlike the pattern envelope which just lists bust, waist, and hip measurements to help determine which size to use, the site above also lists the upper bust measurement.  If someone is bigger than a B cup, they suggest sizing using upper bust instead of bust.

The pattern is also designed for the seamster to adjust the sizing a LOT to get a good fit. So it includes a 1" seam allowances instead of the usual 5/8", and it has you sew the front bodice as usual (princess seams, and darts), and the skirt as usual (pockets, and front pleats). But then things get weird:

You then sew the bodice front to the skirt front inside out (i.e. so the seam allowances are on the outside). 

Then you repeat for the back pieces, constructing the bodice back and skirt back normally (with darts on the inside/wrong side the fabric) then attach them inside out out again.  

Then you attach the front to the back inside out, then you construct the sleeves inside out and attach them inside out, all machine basted.

Then you figure out your adjustments, mark it on the seam allowances, UNPICK all the basting, then sew it together normally.  

I've read it and re-read it, and I can't figure out why this is better.  As far as I can tell, the only advantage is that you can try it on and do all your adjustments with the pretty (right) sides showing.  

But, why not construct the entire dress as you normally would (i.e. sewing with right sides together), but with basted seams.  Then just turn it inside out and put it on that way to do all the adjusting?  

You could make all your adjustments (pick out the too-tight seams and re-baste, or sew new tighter seams where it's too loose) with it inside out, then when it is right ... just sew over the basted seams with a normal machine stitch.  No wasted time picking out all the basted seams, and no risks of sewing it back together wrong. 

Another technique is to sew it the way they say (wrong sides together so it's inside out) but with 3/4" seam allowance instead of 1" and plan to make it a French seam. Once everything is right, you sew the vertical seams over the basting, trim the seam allowances to about 1/4" then you turn the dress right side out and sew them again with a 1/4" seam allowance.  That way the raw edges are fully enclosed and there's no chance of basted stitches showing on the outside.

Sunday, July 19, 2020

Constructing a Kimball Mask - the Laundry List

DRAFT

Kimball Mask instructions for first-time mask-makers

There are many different methods for constructing the masks - Carol's instructions work as do the ones below.  It's a very forgiving pattern.

I think this construction method is especially helpful when trying to custom-fit a mask, or for someone who's never made a Kimball mask before. It's less efficient for mass-producing masks, but it allows for the seamster to stop and make adjustments for individual fit.

Note: child (standard/Big Schnozz, full chin/short beard, big beard) indicates which size; thus 1(2, 2.5, 3)" means, 1" for the child, 2" for the standard and so on.  And these amounts might be customized depending on the needs of the wearer. I haven't gotten all the different sizes filled in yet.

Supplies/notions needed:

  • Fabric - A fat quarter will make 2 to 8 masks depending on the size and number of layers desired.
  • Bias tape (about 1 yard or thereabouts per mask, preferably 1" double-fold)
  • Something for ear loops and ties (can be bias tape, twill tape, t-shirt yarn)

Initial preparation (cutting out, nose dart, and chin gathers):

  1. Trace and cut 1 or 2 mask bodies out (depending on the number of layers desired). If doing 2 layers, repeat steps 2-5 for each layer separately.
  2. Sew nose dart, ¼” seam allowance. Press seam allowance open.
  3. Run two rows of basting stitches very near the bottom edge inside seam allowance, from two gather points marked on pattern (the gather points may vary depending on customization needed).
  4. Gather the fabric, bringing the distance between the gather points to about child (standard/Big Schnozz, full chin/short beard, big beard) 3.5 (3.5, 8.5 9.75)".  When length is correct, knot the basting threads to hold the length static until sewing.   (Note: for my husband who has a pointy-chin and relatively short-trimmed beard, Carol had me gather in the chin area to 3").
  5. Distribute gathers evenly between two points. 

Nose Channel* (Cathy's removable nose-wire variation - see the Industrial Tutorial method to install it inside the top binding.

If making a two-layer mask, this will be done on the right side of the BACK-facing (ie, against the skin) fabric.  If making a one-layer mask, it will be done on the wrong side of the fabric.

  1. Cut a piece of bias tape or twill tape to a length that is equal to the width of the mask along the top edge.
  2. Line it up, so the tape extends all the way to the edges on either side, and affix it in place along the top of the mask.
  3. On the left side, turn the tape under by ½” or perhaps a little more (this edge will remain open so the nose wire can be removed or replaced).
  4. Sew all the way across the mask along the bottom edge of the nose-wire channel.  Sew very close to the edge. Don’t worry about the right side, or top edge of the channel. These will be sewn (turned into a pocket) when the edges of the mask are bound.
Note: when binding the top of the mask, depending on how wide your bias tape or twill tape is, it might make the nose channel too narrow. Adjust placement of the nose channel downward/away from top edge as needed)


* This is Cathy's removable nose-wire variation - see the Industrial Tutorial method to install it inside the bias tape binding.  Putting the nose wire inside the bias tape has the advantage of the most adjustability, as the wire is at the very edge of the mask, and is the quickest for producing a lot of masks. Cathy's variation makes the wire removable, but takes longer.


Binding the edges of the mask:

Over the course of the testing, and development of efficiency techniques, whether to bind the top first, and then the bottom/sides changed a few times.

  • If you are mass-producing, then it works better to do the top first (which allows you to catch the lower ear loop attachments in the binding, saving a step.  
  • If you are customizing a mask, you should do bottom/sides first, then the top, which allows you to leave the lower ear-loop attachments free, so that you can find the best spot to attach it for customization purposes.  This is the method I outline below.

  1. If making a 2-layer mask, place masks wrong sides together (if making a single-layer mask, ignore this step).
  2. Attach binding to sides and bottom of the mask (1” double-fold is easiest). Without cutting the bias tape (yet), unfold one side and line up the raw edge of the tape with the top raw edge of the mask against the back side of the mask (side facing the skin). Line up the cut edge of the bias tape with the top corner, run it down the side, across the bottom and up the far side, clipping as you go.  
  3. Sew very close to the edge, removing clips and adjusting bias tape as you go.
  4. Cut bias tape even with top edge of the mask.
  5. Flip the bias tape to the front, and press, trying to match the folded edges as best you can. 
  6. Top stitch the binding on the front of the mask.
  7. Cut the top binding to about 1” longer than the width of the mask along top edge and fold ½” under on both ends. Attach binding the top of the mask in the same manner as above.  
Note: bias tape won't unravel, so you may cut it to the same width as the mask if you prefer. If using twill tape then it should be cut 1" longer and fold under 1/2" on each side.  

Attach ear loops at the top of the mask, two methods:

Separately sewn ear loops:

  1. Cut two ear loops, 9.75/10.5(11, 11.5, 11.5) Note: for my friend with an extra large noggin (26.5" circumference), I went with 13".
  2. Fold ½” under and sew to top corner, even with top edge. Then skip to the attach ties section below.

Continuous ear loops:

If you prefer to to thread the ear extensions inside the top channel:

  1. Cut a single long ear loop, that = width of the mask along top edge + (tie length x 2). So, if the mask is 9" wide, and if the ear loops are 11", then it would be 9+11+11= 31".
  2. Thread the ear loop through the top channel of the mask and center it so the ear loops extend an equal distance on either side of mask.
This method may achieve a better seal along the top of the mask, by providing a little padding at the top. It cannot be used if the nose wire is permanently sewn into the top edge bias binding.

Attach ties:

  1. Cut 2 ties, 12” long.
  2. Finish one end of each of the ties (if desired, you may omit this step if using bias tape or t-shirt yarn)
  3. Create a loop in the other end and sew. I fold under 1/4" and press, then fold that over by 1" and sew through the 1/4" fold so the raw edge is enclosed. Repeat for second tie.
  4. Thread the loop onto the ends of an ear loop and slide out of the way.  Repeat for the other side.

Attach end of ear loop to side of mask: 

  1. Mark the sides of the mask 2.5" and 3” below top edge.  
  2. Pin the end of the ear loop to the mask, and check fit.  The attachment should be high enough that the ear doesn't drag the mask upward into the eyes, but low enough that the ear loop holds the chin section in place. Use the marks on the pattern to determine where to attach the lower loop. (Most are about 2.5" below the top, with the bigger ones about 3" below). Also check the length of the ear loops.  They should be long enough that when the ties are tied around the back of the head, the ear loops don't touch - they should be about 2-3" apart.
  3. Trim the ear loops if necessary, and Fold under the end of the ear loop and press.
  4. Sew in place at the appropriate attachment point.  Sew the ear loop on bias tape, right next to fabric body. 
  5. Repeat for the other side. 
  6. For extra security, sew again at very edge of mask (optional).

Nose wire:

Make a nose wire at least 6” long (but no longer than the channel), and insert in the nose-wire channel, center, and bend slightly at the center.

Note: so far, I’ve had the best luck with cutting two 6.5” lengths of 16 gauge aluminum craft wire (though I understand floral wire is very good too), bending the ends into loops, and encasing it in a strip of duct tape about ¾” wide (I place the two wires slightly offset so the loops don’t interfere, about ¼” apart, and fold the long edges of the duct tape in to enclose it.) This makes a double-nose-wire strip about 1/4" or so wide. Don't sweat it, if things are a little uneven.

Custom fitting and construction variations:

There will be slight variations in:

  • Base pattern shape and height
  • Chin gather placement and gathering amount
  • Length of ear loops
  • Ear loop lower attachment point 


If you are making multiple patterns for the same person, and  know exactly how long to make the ear loops, and where to attach the lower points, you can construct it with the following variation:


  1. Bind upper edge first, (don’t bother turning under ½” on each side - just cut binding to same width as top edge).
  2. Cut ear loops to the appropriate length
  3. Baste ear loops to mask body on FRONT of mask. One end will be even with the top edge, the other about 2.5-3” below top edge depending on size. Match raw edges of ear loop to raw edge of mask sides. The loops will extend across front of mask. 
  4. Bind sides/bottom (if using a binding other than bias tape, cut the binding so it’s about 1” longer than the length along sides/bottom from top corner to top corner, and fold ends under).  This will bind the mask and attach ear loops at the same time.


Another variation: If using double-fold bias tape for the ear loops, you can create the top binding and ear loops in one step:

  1. Bind sides/bottom of mask as described above.
  2. Cut the bias tape using the continuous method above (width of mask along top edge+ear loop length x 2). 
  3. Fold bias in half along the long dimension, and press.
  4. Match center of bias to center of top edge of mask, and insert the top of the mask into the fold. 
  5. Clip along top of mask. 
  6. Sew the bias tape in one long seam, end-end to end, along the bottom edge. This keeps the bias tape from unfolding, and catches top edge of mask.
  7. Finish bottom of ear loops and ties as described above.


Finally, a mask that fits!


It's time to change gears to a different fiber art (sewing!)


So ... 2020 is the year of the mask.  I have a sewing machine, and when hospitals started asking for masks, I started sewing and sewing and sewing. Best of all, it was something I could do to help out.

I started out making a two-layered surgical-style mask with a pocket for additional filter material. But this style has some negatives - while they fit many faces, they don't everyone.

My husband in particular, found the surgical masks problematic:

  1. They didn't fit his big skull, and his chin came out the bottom when he spoke.
  2. They slid up into his eyes, no matter how much he adjusted he nose wires.
  3. He found ear elastics really uncomfortable.
While I'm a competent seamster (I've made a few nightgowns and dresses for my daughter when she was little, lots of halloween costumes, a couple of formal dresses, and even one pair of jeans) and can follow a pattern, I'm really pretty lost when it comes to modifying patterns or designing, and I really have difficulty understanding the 3D nature of covering a body with fabric. So what that meant, is that finding a mask that fit was going to involve a LOT of trial-and-error.

I tried some of the fitted styles that I found, but they ended up being even worse than the surgical-style for my husband (they were fine for many other people, though!). And I really wanted the mask to fit. Chris was totally onboard with mask wearing, but the best mask is the one that someone will wear consistently, and that means it must both fit properly and be comfortable.   But after the third mask pattern I tried still didn't solve the problems, I started asking around in the sewing groups on Ravelry, and lo-and-behold, someone gave me Carol Kimball's name and email.  And the rest is history. :-)

Carol had me take photos of my husband, showing certain angles and measurements.


Next, she told me how to modify the mask she was testing, and we got it in the very first try. Chris has a long face and a rather narrow, pointed chin, so she had me lengthen the pattern, and then to gather the fabric, into a smaller area under the chin.  The new mask was comfortable, stayed out of his eyes, contained his chin even when he was speaking, and didn't dig into his ears at all.


Then, I found out that a friend of mine, with a seriously large noggin was also having trouble finding masks that fit.  That friend happens to be a medical school professor, who was (and still is) combing through the medical literature, and posting his findings and commentary on FB (and urging people to wear masks). So, I offered to make him a mask. He sent along the same type of pics:


Carol told me what modifications to make - lengthen it it to fit (as I had with Chris's), and because James has a fuller chin, to spread the gathers out over a wider area, and much to my surprise, his fit perfectly on the first try, too.  Carol knows her stuff!  Here's the working-muslin I made him (note the lower strap was still pinned - once he adjusted the straps to an appropriate length, he sent me the measurements, and then sewed the lower strap-end himself).


It's not shown, but I then made him a finished mask out of a fabric printed with images of the COVID19 virus. When I sent him the finished mask, I also sent him his bespoke pattern, so he could have more made if he wished.  He happened to be wearing that mask when he was interviewed by his local TV station, which you see in this video. It shows him wearing it properly at about 0:58 seconds into the video, though he pulled it down for the actual interview (which was filmed from an appropriate social distance!).

Anyway, I was delighted to be part of the testing (if only to test it for a couple of edge cases).  So many thanks to Carol and her testers who welcomed me into their group.

You can find the mask pattern here: The Kimball Mask.


The Kimball Mask

Carol Kimball is a seamster with an agenda.

Carol: "I hope the creative problem-solving keeps going."

In this age of COVID19 which has inspired fraught and fearful feelings in all of us, she wanted to help people find a way to work together and to give them purpose - to make them feel useful instead of powerless.


There were many people who felt there was very little they can do to help fight the pandemic, other than stay home and wait it out - and I was one of them, until I remembered I had a sewing machine, and years worth of cotton fabric leftover scraps.  While I was dusting off my rusty sewing skills, Carol had begun designing a mask pattern that would be comfortable, fit properly, and be easily customizable.


She had some pretty big mask-goals. The mask must:
  • Be a well-fitting and ergonomic pattern that would fit most people immediately.
  • Provide sufficient hand-holding for new seamsters.
  • Be easily altered/customized for face length and width, chin shape, and nose size.
  • Have an adjustable tying-system that accommodates different head shapes and hair styles.
  • Empower folks - give them a way to help others fight the pandemic.  
  • Be efficient to produce in quantity.

Mask can be tied at the back of the neck ...

... or above a bun or ponytail. It is also comfortable on the ears.


Additionally she used the pattern as an excuse to work up industrial efficiency techniques that folks could adapt for use in other projects: Kimball Industrial Tutorial PDF

Carol had a core advisory group and testers that helped bring the pattern to completion: Elisala, Helen, Joyce, Laurie, Lisa, LittleHipkitty, Marianna, Marianne, Meredith, UnplannedCauli, Virginia and myself.  I think I can speak for the group, when I saw we are all delighted and grateful that we were able to be part of this effort, and as Laurie says, "Her work has made people safer and buoyed spirits."

There were other supporters:

  • Lisa D ordered 500 masks to send to healthcare workers in hotspots around the country to use until they got enough N95s, and also to use when not at work, a few neighbors, and underwrote the project with supplies/freight.
  • The UnRavelers group on Ravelry which contributed funds and fabric to the project. They have underwritten other projects Carol has been involved with, including for the Lakota Pine Ridge Indian Reservation, which needed masks to fight the epidemic.  

Child size.

Copyright: Carol gives permission to use/copy/forward/publish this pattern for free as long as her name remains on it. Please do not copy/paste all or portions of the pattern into other patterns. If you have any questions regarding her patterns, contact her at:  herfirstname dot herlastname at [name of our planet]link dot net.

The pattern PDFs provide 10 sizes and variations from child up to XL adult, plus other variations.

Version to (help) contain a beard

For more reading on the Kimball mask see my other blog posts: