Note: You can click on any image to see a bigger version.
 |
| Chris modeling his nearly-finished gardening belt. |
So, for Christmas (2022) I made shop aprons or tool-belts for my brothers and mom, using Spoonflower fabrics that reflected each person's interests. It was a blast, and they were well-received.
One of the patterns I used was the Helen's Closet Dogwood Apron from an indie-pattern designer. It looks like an apron that waitstaff might use, but it's designed for easy customization, for any activity where you might need a variety of different tools. Note the cool pockets in the images below (I love pockets!). I thought it was a good candidate for gardening tools, so I offered to make one for my husband. Note: the pattern designer calls it an advanced-beginner pattern. I personally would call it an intermediate pattern - the welt pocket opening is a little tricky.
 |
| Image from the pattern designer. |
 |
| Image from the pattern designer. |
Chris wasn't sure he'd wear or use a tool belt (no matter how well-designed it was) but he was willing to give it a go, as long as I understood he'd try it, but that he might not end up finding it useful. I like a challenge, so I agreed.
Right off the bat, I knew I wanted to modify the pattern:
- I used 2" heavy-duty cotton webbing for the waistband instead of matching fabric.
- I didn't bother with the snap loop, and moved U-shaped loop on the left, to the right.
- I placed the buckle on one side at the hip, not in the middle of the back. Much easier to manage on one side. (I probably should have checked with Chris on that one - he finds a center-back buckle easier. If the belt proves useful, I'll pick out the stitches and re-attach it so the buckle is centered).
But what other changes should I make? His response: "I want one big pocket in the middle for general use, one pocket for a gardening pen, one pocket for secateurs, and a way to attach my hori-hori."* Then he brought me all three items so that I could use them for sizing purposes.
So that meant the following changes:
- I made the height of the bottom pocket band about 3/4" taller/deeper, so the gardening clippers (hopefully) couldn't fall out.
- The bottom pocket band has only three pockets: a narrow pen pocket with an adjusted bottom depth so it wouldn't slip too far down on the left side (his right when worn; he's right-handed).
- A 2.5" wide pocket on the right side for the gardening shears. It's lined with faux leather so the blades wouldn't cut through the fabric (or stab my husband). I also made the front of the holster slightly wider than the back, so when I sewed the edges together, the front bowed out a little, making it easy to drop the blades in without catching them on the fabric. I hand-sewed the edges of the holster/liner inside the pocket, so he couldn't accidentally insert the shears between the layers.
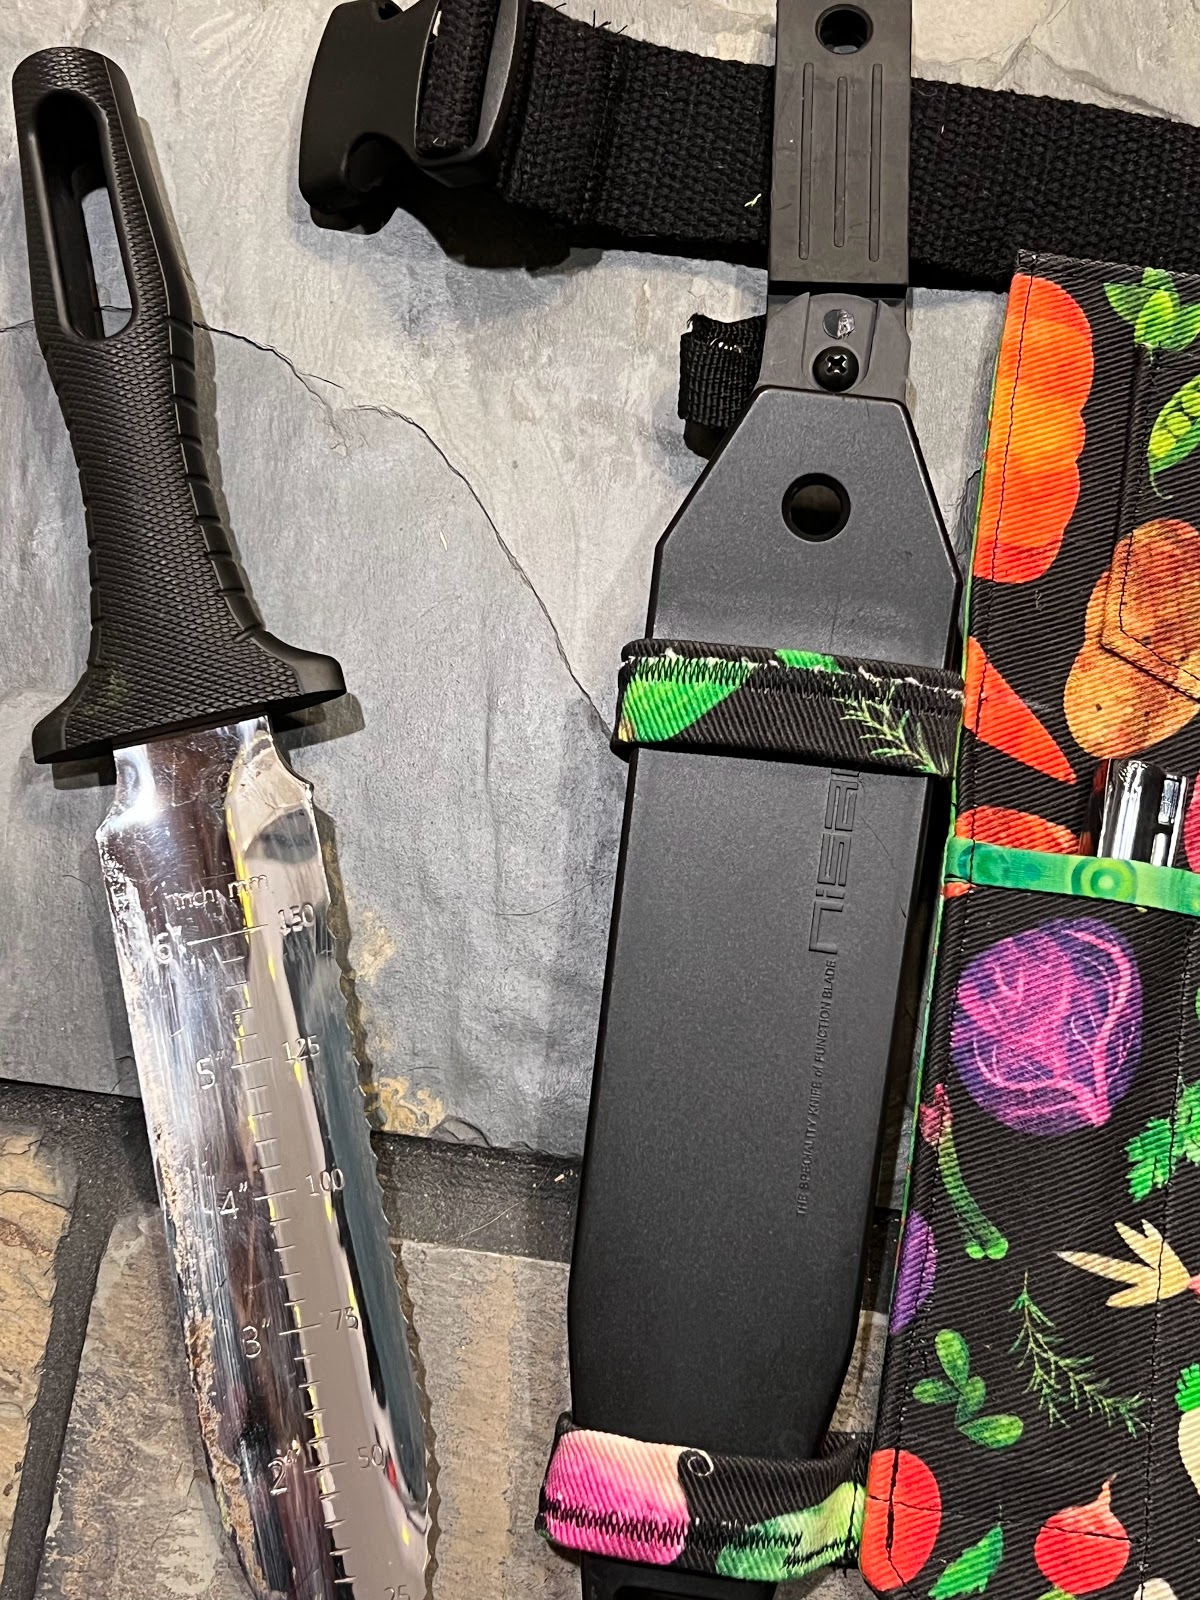
- Loops or ties on the side to hold the hori-hori holster in place. The spade comes with a hard-plastic sheath with an attached belt loop, so I simply hung the loop from the apron belt. The belt loop on the spade is about 2.5" wide, and the webbing and buckle are just small enough to slip through. So he can remove it and place it on another belt if he wants to.
I also had him pick the fabric he wanted from Spoonflower and a
favorite was a rainbow of vegetables on a white background. The print came from an indie designer and I requested they add the same print but on a black background (so it wouldn't look instantly dirty), and they were happy to create that option. So I bought one yard printed on Spoonflower's heavy-denim fabric. I used tightly-woven cotton batiks as the lining and backing fabrics.
Note: I washed and dried the denim three times once it arrived. Denim is a "progressive shrinker" and to avoid it shrinking weirdly after the garment is made, you should wash/dry it at least 3 times (flannel is another fabric like that).
At first, I thought the hori-hori should have ties, as I thought ties were better to add flexibility, should he want to put something other than the hori-hori there. But the fabric ties were stiff and hard to use:
 |
| Ties |
So, I removed them, and fashioned loops that are fitted to the hori-hori scabbard, and that worked much better:
 |
| Loops |
 |
Pen pocket and small
decorative pocket above. |
 |
| Big middle pocket for general use. |
 |
| Welt pocket flap |
 |
| Hidden welt pocket |
 |
Secateur pocket lined with heavy-duty faux leather.
I added the leather lining after the belt was constructed,
and should be easily replaceable if it wears through.
|
 |
Belt as a whole
|
What I would do differently: the welt pocket should be much bigger. It's only a little wider than the flap, and 2-3 (?) inches shorter than the height of the apron itself. I would make it 3-4" wider (or perhaps nearly as wide as the apron?) and extend down to the bottom edge of the apron body.
* For the non-gardeners: a gardening pen is like a Sharpie, but with UV-resistant ink, secateurs are gardening shears/clippers, and a hori-hori is a Japanese gardening spade/knife/soil-depth measurement tool.


You should sell those...I would buy a few. Came from permies checking the link. This is awesome!
ReplyDeleteThanks! You made my day. :-)
DeleteThe main problem is that they take 5-6 hours to make, which means that between labor costs and materials, they'd be pretty expensive, more than most people are willing to pay.