Showing posts with label Knitting. Show all posts

Saturday, December 7, 2024

Knitting Techniques - Cables

Cables are magic.  They are super cool, look incredibly complex, and make the knitter look quite talented.  But I'll let you in on a little secret: cables are easy and are barely more than beginner-level in difficulty.  

Cable crosses change the order of the stitches on the needle, crossing them in front of or behind the ones next to them.  And by combining cables, you can make incredibly complex textures and designs.

There are two main kinds of cables: 

  • Right (or back) crosses - the cable leans or travels to the right
  • Left (or front) crosses - the cable leans or travels to the left.
Right Cross (back) instructions: Slip the called-for number of stitches purlwise onto a cable needle. Dangle the cable needle with those stitches to the BACK or behind your fabric.  Work the appropriate number of stitches from the left needle, then pick up the cable needle, and work the stitches from the cable needle. In effect, these stitches crossed behind the ones you already worked.

Left Cross (front) instructions: Slip the called-for number of stitches purlwise onto a cable needle. Dangle the cable needle with those stitches in FRONT of your fabric.  Work the appropriate number of stitches from the left needle, then pick up the cable needle, and work the stitches from the cable needle. In effect, these stitches crossed in front of the ones you already worked. 

Here's a pretty good video that demonstrates how to create cables:


The terminology varies from pattern to pattern, but some use the front/back notation with abbreviations like C4B or C4F (ex., C4B = Cable 4 stitches in total, two onto the cable needle which you hold to the back of the work, plus the next two stitches from the left needle) and some use the left/right (ex., LC 3/3 = left cross three stitches by putting 3 stitches onto a cable needle, holding them to the front, working the next three stitches from the left needle, then working the three stitches from the cable needle).   

I myself prefer the front/back notation because it tells you what to DO, whereas the right/left tells you how it looks when you are done, and I have to translate where to hold the cable needle in my head. But the charting software that I use to create my charts uses the left/right notation, so when I'm designing, that's what I use as well.

There's a nifty pneumonic that helps, though:  "I left through the front door, but I'll be right back!"  Left crosses dangle the needle to the front, and right crosses dangle the needle to the back.

Links to other cable tutorials and informational articles.

  • TECHKnitter - an excellent, in-depth explanation
  • Purl Soho
  • Cabling without a needle (I only do this if I'm working 2, 3 or 4 stitch cables, crossing only 1 or two stitches - more than that, and I'm not confident I won't lose a stitch or two).
Note: When cabling without a needle, I do my right crosses a little differently. I don't like pinching the loose stitches on the back of the needle, both because I can't see what I'm doing and I prefer to pinch with my thumb, and at some point I realized you could accomplish the same result by reversing the left/right needles:
  1. Slip all stitches to be cabled to the right needle.
  2. Insert the tip of the LEFT needle into the first (far) stitches slipped onto the right needle behind the work.
  3. Pinch the left/near stitches against the left needle with your left thumb. 
  4. Withdraw the RIGHT needle from all stitches to be cabled. 
  5. Immediately insert the right needle into the loose stitches
  6. Slip those stitches back to the left needle.
  7. Knit across.

Sunday, August 11, 2024

Knitting Pattern: The Riveter

Note: Click on any image below to enlarge it.

Me, modeling the kerchief

Inspired by the famous Rosie-the-Riveter "We Can Do It!" poster from World War 2, I designed a knitted version of the red-and-white polka-dotted kerchief worn by Rosie:


J. Howard Miller, 1942
Public Domain

During WW2, millions of men were sent overseas to fight the Nazis, leaving labor shortages stateside, and American women rose to the occasion and and began doing traditionally-male jobs. Even women who didn't work outside the home entered the workforce (some for the first time), making massive contributions to the American economy and the war effort, helping the Allies win the war. 

Rosie the Riveter (Vultee), 1943.
Public Domain

Besides Miller's 1942 "We Can Do It!" propaganda poster, there were other posters and ads released encouraging women to join the workforce. Much of the propaganda assumed that it was temporary - that once our men came back from the war, the Rosies would leave the workforce and return to the home:

Monsanto Ad, 1943.
Public Domain.

And many were forced out of the workforce, but in the end, only temporarily (today, women make up 58% of the American workforce).

There was even a song about Rosie:


Today Rosie is a feminist icon representing the women who strive not just to get by, but their efforts to create a world in which we are *equal* partners to the men in our lives, that we can do anything we set our minds to ... even holding the highest office in our land. 

I initially used this pattern as a fundraiser for Kamala Harris, giving it away for free as an incentive to donate to her campaign.  At least ten folks donated, so, THANK YOU!!!!  Now that the campaign is over, I'm raising the price to $7 (it includes two simple lace pattern variations, two different construction techniques, and a blank chart for you to create your own variations, plus it's intended for nearly any yarn weight) and you can purchase it via the Ravelry platform, here:  buy now


Liberty Ship Scaler, 1943. You can see a scarf peaking out
from under her hard hat. Public Domain


Women at work on a bomber, 1942
Public Domain

About the pattern:

Note: This pattern has not been tech-edited (yet!) and has only been partially tested. I'm a tech writer by trade, so it's in good (if not perfect) shape. If you find an error, I'd LOVE it if you'd let me know, so I can fix it sooner rather than later.

The headscarf is knitted flat from the bottom up, and is intended to be custom-fit to the wearer as you knit it (and so I recommend you use a 24" (70cm) circular needles rather than long straights). 

You can use any yarn weight, from light fingering up to heavy worsted/Aran, and the white polka-dots are represented with beads (I like the white pearlescent ones as a nod to Kamala's pearls, but any color is fine), either pony beads for heavier yarn, or large seed beads for thinner yarn, and the border and ties are knitted in seed stitch to echo the original offset polka-dot design. 

The pattern includes:

  • Written and charted instructions.
  • Two different very simple lace patterns to choose from (a plain one that looks more like the poster, and a diamond lace pattern that hints at a bandanna design).
  • A three-tie version that allows you to tie it at the top of the head as Rosie does, and also at the nape, and a two-tie version that ties only at the nape.
  • Blank chart for your own designs.

Techniques used in the pattern:

Wearing it like Rosie

There are a couple of ways to tie the kerchief:

Clockwise from upper left.

  1. Drape the kerchief around your shoulders, right-side DOWN, bottom tie dangling down your back, top ties draped in front of your shoulders. 
  2. Bring the top ties up to the top of your head, and tie them (single cross only) like a headband.
  3. Pull the bottom tie up the back of your head, and forward, tucking it under the top ties, and pulling it forward so it drapes in front of your nose.  Neaten and flip the edges so they aren't inside-out.  Tighten the top ties so they are both secure and comfortable
  4. Flip the bottom tie from your nose, over the top ties so that it's pointing toward the back of your head
  5. Tie the top ties again, this time over the bottom tie.
  6. Neaten, tighten, artfully tuck.


Here's a video tutorial. The tying starts at about 27 seconds in, if you want to skip forward:


Another way to get to the same end result:


    1. Drape the kerchief on your head right-side UP, with the top ties at your shoulders, and the bottom tie draping down over your face/nose.
    2. Pick up the top ties and draw them up to the top of your head, and tie them (single cross only), so that they hold down the bottom tie. Release the top ties so they drape on either side of your head.
    3. Pick up the bottom tie from your nose, and flip it back over the top ties, so that it points toward the back of your head.
    4. Pick up the top ties again, and tie them in a knot. From there, pick up with step 6 in the first set of instructions

      And finally - admire your results!


      Anna Bland at work on
      USS George Washington Carver, 1943.
      Public Domain


      Welder works on aircraft parts at
      Offutt Air Force Base, NE, 1940s.
      Public Domain

      All Things Knitting

      My Available Designs


      My Unpublished/Unfinished Designs (must have a Ravelry account for access the links, but there are some select photos at the bottom of this post):


      Miscellaneous Knitting Stories and Other Stuff:

      Irrelevant/Outdated Knitting Articles:
      A Selection of My Best knits:


      The Argus Hat (my design, link above)


      The Riveter (my design, link above)

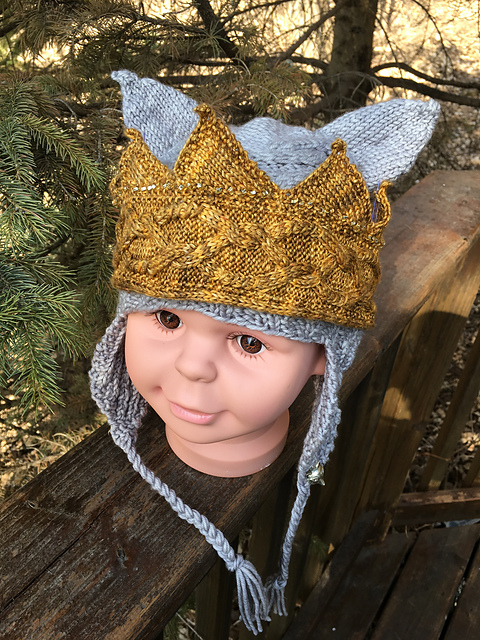
      Wild Rumpus Hat (my design, unpublished)

      Iris Tam (my design, unpublished)

      The Argus Hat (my design, link above)


      Sean's Simple Harvest

      Chad's Chouette

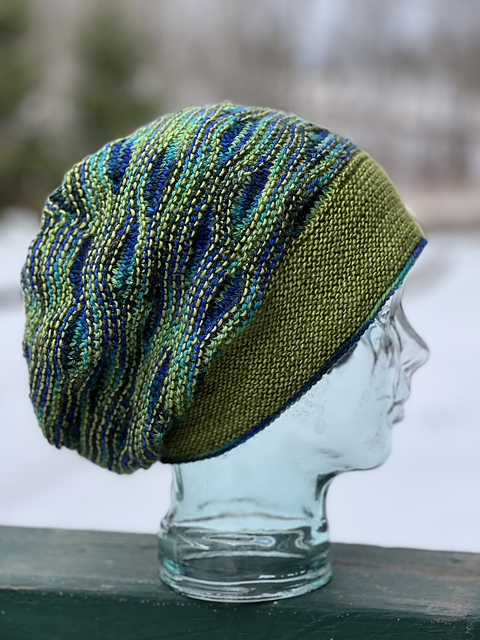
      My Salem Slouch

      Norberta Shawlette

      A Trio of Jayne Cobb Hats

      Paul's R2D2 Hat

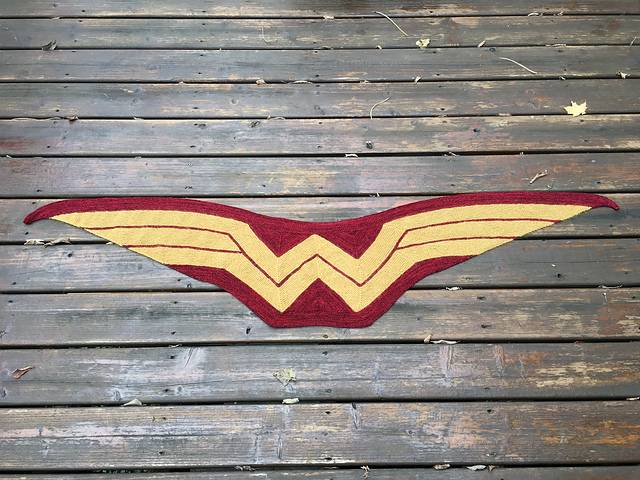
      Wonder Woman Wrap


      Saturday, August 10, 2024

      Knitting Techniques - Increases

      I most often use m1 and kfb increases in my patterns (I'll add to this page when or if I ever use other increases in my patterns.

      Make 1 (m1)

      First, a pneumonic: "I left through the front door, but I'll be right back." I didn't come up with that - I read it on Ravelry somewhere, but it's a lifesaver. Left-leaning M1s (both M1L and M1PL) are worked by inserting the left needle from front to back.  Right-leaning M1s (both M1R and M1PR) are worked by inserting the left needle from back to front.

      Conceptually, all m1s are made the same way: 

      • Lifting the top strand of yarn that connects the last stitch knitted (on right needle) to the next stitch to be knitted (on the left needle)
      • Placing the strand on the left needle (it looks a little like a tight yarn over at this point)
      • Working the strand as if it were a twisted stitch.

      Note: to borrow from Debbie Stoller's description of how to twist (or not twist) a stitch:

      • When knitting normally, you always knit or purl through the leading leg (ie, the portion of the loop that is farther to the right).  This may or may not help, but to me leading leg appears longer than the trailing leg when doing M1s or working YOs on the next row. When working a normal stitch (not an increase) this is typically described as the front leg.  
      • When you wish to twist a stitch, you knit or purl through the trailing (or shorter) leg. When it's a regular stitch, it's often called the back loop (ex: k tbl).


      Make 1 Left (M1L) or Make 1 Purl Left (M1PL) - "I left through the front door":

      • Lift the top strand connecting the last stitch on the right needle and the first stitch on the left needle by inserting your left needle from FRONT to back under that strand. 
      • Knit or Purl as appropriate through the trailing leg, which happens to be the back leg in this case.


      Make 1 Right (M1R) or Make 1 Purl Right (M1PR) - "but I'll be right back":

      • Lift the top strand connecting the last stitch on the right needle and the first stitch on the left needle by inserting your left needle from BACK to front under that strand.
      • Knit or Purl as appropriate through the trailing leg, which happens to be the front leg in this case.

      For more info on M1 increases (including pictures) see:


      Knit-Front-Back (kfb)

      • Insert the right needle into the front loop (leading leg) of the stitch but, leave the stitch on the left needle.
      • Insert the right needle into the back loop (trailing leg) and knit. 
      • Slip both stitches to right needle.


      Wednesday, August 7, 2024

      Call for Test knitters: The Riveter Headscarf (you know the one - Rosie's "We Can Do It!" red and white scarf)

      Looking for some quick help - I designed a headscarf inspired by the Rosie the Riveter headscarf in that famous poster from WW2. 


      Me, in the first one I made
      https://www.ravelry.com/projects/CathyWeeks/the-riveter


      But before I can release it, I need test knitters to make the scarf using my pattern and ensure there aren't any mistakes before I put it up for sale.  In return, I'll give you the final version of the pattern for free.  

      Required:
      • Intermediate knitting skill, preferably some experience with beaded knits (though beading experience isn't required - it's very easy)
      • One skein (100g) of worsted-weight yarn in the color and fiber of your choice.  Two if you are making an extra roomy version either for long hair, or if the recipient has a bigger head.
      • Knitting needles
      • Pony beads (color of your choice)
      • Crochet hook small enough to fit through the beads (or other beading tool of your choice)
      • Send me any mistakes you find ASAP
      • Preferably, you'd create a project page on Ravelry.
      There is no required gauge, and you can use any weight yarn from fingering up through heavy worsted. If you really want to use fingering-weight yarn, that's fine, but it'll take longer (and you'd need to use a very large seed bead (like #2s) and a teeny-tiny crochet hook to get them onto the yarn). 

      I'm looking for 4-8 people to test it, one or two people for each of the variations (I have four variations: it can be made with either two or three ties, and there are two different very simple lace patterns for the body, one plain, one a diamond pattern to mimic a bandanna).

      If you are interested and can take this on pretty quickly, leave me a comment with your email address. I have comment moderation turned on, and WILL NOT publish the comment with your email - don't want to open you up for spam.  I'll simply reach out to you via email and delete your comment. Alternatively, you can reach me on Ravelry here, or here.

      You can see more pics of the diamond lace version here: https://www.ravelry.com/projects/CathyWeeks/the-riveter


      J. Howard Miller's "We Can Do It!"
      poster from 1943. Public Domain.


      Thursday, February 21, 2019

      The Argus Hat

      I designed a hat!


      Eons ago, Hera, the queen of the gods, had a trusted guard - the giant Argus with one hundred eyes.  Argus was an exceptional guard - he never closed more than half his eyes, even when he was sleeping.  Hera asked Argus to guard Io, a young mortal woman being pursued by Hera’s husband, Zeus.  

      Zeus sent his son, Hermes, to free Io from Argus and Hera.  But Argus’s peculiar sleeping habits and his many eyes proved a difficult problem. Finally, Hermes simply told a story so long and so boring that eventually all of Argus’s eyes closed in sleep. Hermes seized the opportunity and killed Hera’s trusted servant.  

      To commemorate her faithful servant, Hera preserved his eyes in the tail of her favorite bird - a peacock.

      Even today, Argus is synonymous with watchfulness and a guardian spirit. J.K Rowling even gave his name to one of the characters in her Harry Potter series: Argus Filch, the caretaker of Hogwarts school, who always seemed to know when students were out of their beds at night.


      This hat is the first of a series of free-form hats that I designed that use short rows to concentrate colors and form “eyes.”  It is designed for variegated yarn and helps to tame the chaos that variegated yarns produce.  You will respond to the colors in the yarn and learn how to control where the eyes fall.  This hat is also a helix knit, alternating 2 strands of yarn to form an unbroken, jog-free garter stitch spiral. 

      The hat itself is a reasonably simple pattern, but the short rows in response to color changes, and helix knitting make it a more challenging knit, suitable for adventurous knitters who enjoy making decisions on the fly and are comfortable with a bit of chaos.


      Freeform knitting is extraordinarily difficult to explain because it's conceptually pretty different than standard knitting, and the pattern includes detailed instructions on how to control where the eyes fall.  As a result - the pattern is 14 pages long!

      Here's the hat being modeled by my daughter:


      The hat is available for sale in my Ravelry store.   It provides instructions for one adult size, and is designed for worsted-weight yarn, but adjusting the size (or converting for use with other yarn weights) isn't hard to do. To save space in the pattern itself (which is already pretty long), I include the instructions for adjusting the size/yarn weight here on my blog.  You can use the instructions to change yarn weights, make a fitted hat (instead of a slouchy one), or make a new size (baby, child, teen, or for someone with an extra-large noggin). 

      Here's the pattern page on Ravelry. You can purchase it there, or by clicking on this link if you prefer: buy now.


      Custom Fitting the Argus Hat

      Adjusting the number of CO stitches or the circumference of the hat

      I designed the Argus Hat for an averaged-sized adult head, which is around 22 or 23”/56-58.5cm, and if you are using worsted-weight yarn, you should cast on 96 stitches (or 88 if you like it a bit tighter).  But what if you want to use a different weight yarn (fingering, sport, DK, and aran/bulky are all possible), or what if you want to custom-fit the hat to someone with a bigger head (like for my husband who has a 24" noggin) or a child?

      If using a yarn weigh other than worsted, you will need to get a nice firm fabric (but not as tight/dense as you'd try to get with socks) with your SMALLER needles.  This is the stitch gauge that you will use for the cast on.

      If you are using a weight other than worsted, or if you want to custom-fit the hat, use the following table:


      (Head circumference - negative ease) = hat circumference.
      Hat circumference x stitch gauge = CO number.  Adjust up or down to the nearest number divisible by 8.
      Head circumference

      Negative ease*
      Minus 4” or 7.6cm
      Hat circumference
      =
      Stitch gauge per
      1 inch or centimeter
      x
      CO Base
      =
      CO Actual: Adjust up/down to nearest number divisible by 8:


      * Note: Negative ease means that the item is smaller around than the item being covered, so that the knitted item must stretch to fit.  Things like hat bands, cuffs and waist bands on sweaters, and the tops of socks are typically made with negative ease.  Conversely, positive ease means it's bigger around than the body part, and fits loosely. And zero ease means that it fits exactly without being loose, or having to stretch.

      Adjusting the HEIGHT of the hat:

      As designed, the hat is a slouchy hat. If you want a fitted beanie, not a slouchy hat, OR if you want change the size (a child-sized hat won't need to be as tall as an adult hat), then you'll use the table below.

      To fit anyone regardless of size or age, measure from eyebrows over the top of the head to the base of the skull, and divide in half.  If fully covering the ears is a priority, then measure from the bottom of one earlobe, over the top of the head, to the base of the other earlobe, and then divide THAT measurement in half.  This is the height of a fitted hat from the bottom of the cuff to the top of the crown.

      But ... the hat height = cuff+rise+crown decreases.   So, in order to make a fitted hat, you need to figure out how tall the crown decrease section is, and subtract that from the total, and that's how tall you make the hat, before starting the decreases.

      Figuring out the height of the crown decrease section can be tricky.  Basically, you have to figure out exactly how many rounds are in the crown decrease section (counting both decrease rounds AND the rounds between them, as for this hat you decrease every other round).  I usually have to work it in a spreadsheet.  But, for the Argus Hat, I've done the work for you. :-)

      Just plug in your values into the table, and do the math, and it will give you your hat height.

      So, to fit the hat height, do one of the measurements described above, and determine your ROW gauge.  If you are making an adult hat, knit until the hat is right about 4" (10 cm) tall from the cast on edge and then determine your row gauge. Row gauge in this hat is tricky, because the number of rounds varies due to the short rows.  So, take several measurements, and average them.

      If you are making a child's hat, determine your row gauge when it's about 3" (7.5 cm) tall from the cast on edge, and if making a baby hat, determine your row gauge when it's about 2" (5 cm) tall.


      Sample hat
      Your hat

      In
      Cm

      Number of CO stitches
      96

      Divided by number of decreases per decrease round
      8
      8
      equals
      12

      Subtract 4
      (because you only decrease until 32 sts remain). This is the number of regular decrease rounds.
      8

      Multiply by 2 (because  you are only decreasing every OTHER round)
      16

      Add one (because there’s an additional k2tog all the way around). This is the number of rounds in crown.
      17

      Determine your ROW gauge (per 4”/10cm)
      24

      Convert to rounds per 1”/1 cm
      6
      2.4

      Divide number of rounds in crown by row gauge per 1 inch/cm. This is the height of the crown.
      2.8”
      7 cm

      Eyebrow-to-base of skull measurement divided in half:
      7.5”
      19 cm

      Subtract crown height from measurement above.
      4.7”
      12 cm

      Add additional height for slouch (optional).
      0”
      0 cm

      Knit to this height before starting the crown decreases.
      4.7”
      12 cm


      Here's the pattern page on Ravelry. You can purchase it there, or by clicking on this link if you prefer: buy now.


      Saturday, February 2, 2019

      Periodicity 3.4: Common Effects - Richer Color

      Sometimes though, what you get when knitting with a variegated skein, is a fully-mixed fabric with a depth of color that you didn’t expect.  These little gifts-of-the-gods can be very hard to predict, though.  I THINK they occur most often when the colors in the skein are very close to each other.

      Fully-mixed fabric that really works for me, happens because the skein contained colors that are very close on the color wheel, and of similar tones, and intensities, so that then they are mixed, create a unified, rich color (Example: blue and green, that appears blue-green from a distance, and kind of flickery up close).

      Or perhaps the skein is all one color, but different intensities.  Here's an example of that in my "Ravelry Red" Malabrigo sweater:
      © Cathy Byland Weeks

      ... Or the light orange section of my brother's Jayne Cobb hat:
      © Cathy Byland Weeks

      Like all things, this is a subjective thing. If it looks good to you, go with it.

      Back to TOC. Back to Effects Intro.

      Periodicity 3.3: Common Effects - Color Confetti (AKA fully-mixed fabric)

      Color Confetti (aka fully-mixed fabric)
      As with pooling, when the gauge, number of stitches across/around interacts just right (or wrong!) with a yarn's skein length and color repeat length, it produces a fabric where the colors are evenly mixed, with no pooling or flashing. The color is often flickery, and reminds me of confetti or sprinkles of color.  My Ravelry friend Nathalie/Skeincharmer calls it buckwheat: "Each grain is different shade of brown but together they produce a uniform, cohesive look."

      Used under a Creative Commons BY-SA 3.0 license.
      Originally, I called this kind/sort of fabric "muddy," but a funny thing happened on the way to this article - one person's "muddy" was the next person's "rich and cohesive."  Over and over again, I saw examples on Ravelry, of projects the knitter who produced it called ugly, that I thought was gorgeous (and occasionally, it happened in the opposite direction).  And, as my Ravelry friend Jaya/Ermabom reminded me, mud-dyed fabrics and yarns are often rich, varying, gorgeous and highly underrated.  And another Ravelry friend Carole/Koiguki sent me a couple of videos on Japanese silk dying that uses mud to create a deep, rich, intensely dark fabric (here's one if you're interested).

      So, I decided to call it “Color-Confetti”, because that’s what it most reminds me of - i.e. flickery mixtures of fully mixed color combinations with no apparent pooling.   They actually remind me a little of random-dot stereograms (but without the 3D part):

      Random dot stereogram depicting a shark. Used under a Creative Commons BY-SA 3.0 license

      In my highly judgmental and utterly subjective opinion, I generally prefer pooled fabrics to color-confetti fabrics (although, there are always plenty of exceptions). The lovely colors in the skein sometimes seem to get lost in the “noise” when the colors are fully mixed.

      However, there are always exceptions. Here are some exceptions that I think are gorgeous:


      Used with permission. ©Susi/SusiJB 

      Project: https://www.ravelry.com/projects/SusiJB/boden
      Pattern: https://www.ravelry.com/patterns/library/boden

      Used with permission. ©Kris/Kristoemily

      Project: https://www.ravelry.com/projects/Kristoemily/wingspan
      Pattern: https://www.ravelry.com/patterns/library/wingspan-2


      Used with permission. © Jenny Sanders
      Project: https://www.ravelry.com/projects/JennyXan/electricity
      Pattern: https://www.ravelry.com/patterns/library/electricity

      I've been trying to figure out why - even though I prefer pooled fabrics - I like the above examples. I think it's because the colors are bold enough to not get lost, or the melange of color just "works," which I know is not terribly helpful.

      Back to TOC. Back to Effects Intro. Forward to Richer Color.

      Periodicity 3.2 Common Effects - Inconsistent Results

      Another common effect, is that the fabric produced is inconsistent. It may produce inconsistencies in the same garment when you change skeins, between matching items (one sock patterns differently than the other), and when changing stitch counts in the same garment.

      You might not mind the flashing so much, but then it stops, and looks completely different in another spot.  Or it's mixed nicely, then you start a new ball of yarn, then it flashes horribly.  Or it’s mixed nicely but you decrease or increase because you are creating covering for a three-dimensional shape, and BOOM, it starts striping. It's also very common for each sock in a pair to pool differently.

      Example: Inconsistency caused by changes in gauge or stitch count
      Pooling be caused (or broken) by changes made by the knitter - changing the gauge/needle size, or the stitch count (You see this in sweaters and hats - where the width of the fabric changes, the patterning does too).

      Here's a planned pooling hat that I made - I was delighted with the pooling/flashing in the hat rise, but when I began the crown decreases, I was NOT amused.  I ended up frogging back to where I started the decreases, and did a completely different crown that allowed me to keep the stitch count consistent.  Eventually I'll release this pattern (once I figure out a different cuff).

      © Cathy Byland Weeks
      You will see similar effects in sweaters, in response to shaping to fit the contours of a torso.

      Example: Inconsistencies caused by changing skeins of yarn.

      Inconsistencies are also caused when you start a new skein - the colors are slightly different, and pool slightly differently. This is most common when using hand-dyed yarns. No two skeins are the same, even among skeins within the same colorway.  This can be sometimes be mitigated by starting the new skein at the same spot in the color-repeat sequence, but that's not a certain fix.  Note Natalia/Skeincharmer's sweater below - the blue arrows show where each new skein was started.

      Used with permission. © Natalia Vasilieva/Skeincharmer

      One skein of my Ravelry Red sweater was a little lighter than the others. You can the light streak going across it, a couple of inches below the top:
      © Cathy Byland Weeks


      Sometimes however, the inconsistency when changing skeins was caused by something beyond the knitter's control. In the case below, the knitter used a very consistent, machine-made yarn, but the final skein was wound in the opposite direction to the previous ones.   Note the direction of the stripes and spirals in the hem:

      Used with permission. © Nicole/Grudgemom
      Project: https://www.ravelry.com/projects/grudgemom/little-miss-myras-sweater

      Example: Inconsistencies between matching garments

      It's even possible for matching garments (like two socks in a pair) will look different, even when they are made from the same skein of yarn.
      Used with permission. © Rebecca/itgirl
      Project: https://www.ravelry.com/projects/itgirl/pool-y-mom-socks 

      I don't know what caused Rebecca's socks to turn out so differently from each other, but it can be caused by several different factors:  
      • Knitting from both ends of the cake: If a knitter knits socks 2AAT, and knits from both ends of a single cake, the socks are going to turn out really differently, because the colors are going in opposite directions. 
      • Starting each sock at different points of the skein color sequence.  
      • Knitting the two items with slight (or extreme!) differences in gauge. This can happen even when the knitter used the same needles and stitch counts.
      • Differences within the skein itself - the first half of the ball may have different color-lengths than the second ball. 
      • Check your stitch counts. Yarn Harlot wrote about her socks being different because she knit one sock as a medium, and the second one as a small.
      Back to TOC. Back to Effects Intro. Forward to Color Confetti.