I came across the new (to me) AmazingFit Collection from Simplicity, and this dress caught my eye:


I also liked that on their online site, Simplicity showed the dress both on a skinny model (on the pattern envelope) and also on a more normal-sized model and I thought it looked good on both of them:

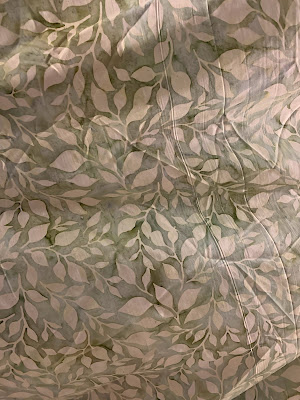
Kivi liked the pattern too, both for the cool neckline, and for the pockets, and she approved a lovely light-weight batik I had in my stash from a failed closet ceiling covering experiment.
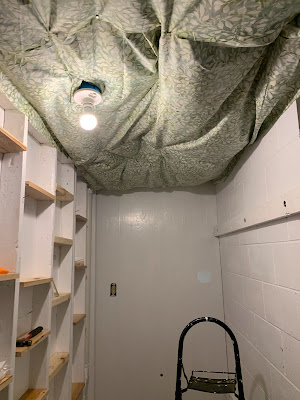 |
| I hated, HATED the fabric in the ceiling of my closet. |
So, onward. It's an unusual pattern in that it provided 4 different bodice pieces, for women with B, C, D, or DD busts. It also gave very clear instructions on how to pick. Measure the bust as usual, and also high bust (the torso above the breasts, basically in the armpits). If the bust was 1-2" bigger than the upper bust, then use bodice B. If 2-3" bigger, then bodice C, and so on.
But it ALSO gave three different skirt back pieces, for a slim, average or curvy fit. From the pattern envelope, it gave me finished garment measurements, but that just showed that the slim fit was 1/2" smaller than the average fit, and the curvy was 1/2" bigger than the average version. The difference in circumference is fairly subtle; who's going to notice 1/2 - 1" difference in a skirt with more than 10" of ease. (I.e., the skirt is supposed to be 10" bigger around than the woman's hips.) I noticed one other thing - the curvy version had two darts on either side of the back zipper, whereas the average and slim had only one.
But it gave ZERO guidance how to choose. The fact that the curvy skirt had two darts instead of one, suggested it was for women with a bigger than average difference between hips and waist, but ... the lack of guidance felt like an oversight. Was it to fit differently? Or was it personal preference? Or was the skirt itself more or less full (no - I later verified that the skirts were the same circumference at the hem).
Turns out, it was an oversight.
I did some online research and I wasn't the only person befuddled by the omission, so I contacted Simplicity's customer service, and we managed to talk past each other for awhile. They kept telling me to refer to the pattern envelope and the sizing there, and I kept trying to reword my query so they'd understand and not jump to the wrong conclusion, and while that was happening, I posted about it on a sewing forum, and someone THERE found a discussion thread on a different sewing forum, and YES WE STRUCK GOLD.
In other AmazingFit patterns, the following blurb appeared:
DETERMINE CORRECT FIGURE TYPE Three separate pattern pieces have been given for the skirt back- slim, average and curvy fit. To determine which figure type you are, use the waist and hip measurements for the size pattern you have selected. Compare the difference of your hip measurement to the standard. If your hip measurement matches the standard or is within 1/2” (1.3cm) in either direction, then choose the Average pattern piece; if your hip measurement is 1/2” - 1-1/2” (1.3cm - 3.8cm) less than the standard choose the Slim pattern piece; if your hip measurement is 1/2” - 1-1/2” (1.3cm - 3.8cm) larger than the standard, choose the Curvy pattern piece.
Someone else paraphrased it:
- Average: hip measurement is within 1"-1 1/2" (2.5-3.8cm) in either direction of standard
- Slim: hip measurement is more than 1"-1 1/2" (2.5-3.8cm) less than standard
- Curvy: hip measurement is more than 1"-1 1/2" (2.5-3.8cm) larger than standard
I immediately shot off another email to Simplicity asking if this guidance holds true for this pattern as well. I got a quick response that they were checking with the design team and would get back to me. I breathed a sigh of relief - that meant they'd finally understood the issue, and realized that I wasn't just another customer that hadn't RTFM.
Half an hour later, they emailed me again - yep, that is indeed the criteria I should use. The pattern was actually one of the very first in the AmazingFit line, and the criteria was added to later patterns. (A not-so-private note to Simplicity: maybe consider publishing an errata and/or FAQ on your site for stuff like this?)
So onward. I'm making a size 18 (I do wish the pattern sizes matched retail sizing), D bust, slim-fit skirt. Also, this page is a big help with sizing and it applies to all of their dress and top patterns:
Unlike the pattern envelope which just lists bust, waist, and hip measurements to help determine which size to use, the site above also lists the upper bust measurement. If someone is bigger than a B cup, they suggest sizing using upper bust instead of bust.
The pattern is also designed for the seamster to adjust the sizing a LOT to get a good fit. So it includes a 1" seam allowances instead of the usual 5/8", and it has you sew the front bodice as usual (princess seams, and darts), and the skirt as usual (pockets, and front pleats). But then things get weird:
You then sew the bodice front to the skirt front inside out (i.e. so the seam allowances are on the outside).
Then you repeat for the back pieces, constructing the bodice back and skirt back normally (with darts on the inside/wrong side the fabric) then attach them inside out out again.
Then you attach the front to the back inside out, then you construct the sleeves inside out and attach them inside out, all machine basted.
Then you figure out your adjustments, mark it on the seam allowances, UNPICK all the basting, then sew it together normally.
I've read it and re-read it, and I can't figure out why this is better. As far as I can tell, the only advantage is that you can try it on and do all your adjustments with the pretty (right) sides showing.
But, why not construct the entire dress as you normally would (i.e. sewing with right sides together), but with basted seams. Then just turn it inside out and put it on that way to do all the adjusting?
You could make all your adjustments (pick out the too-tight seams and re-baste, or sew new tighter seams where it's too loose) with it inside out, then when it is right ... just sew over the basted seams with a normal machine stitch. No wasted time picking out all the basted seams, and no risks of sewing it back together wrong.
Another technique is to sew it the way they say (wrong sides together so it's inside out) but with 3/4" seam allowance instead of 1" and plan to make it a French seam. Once everything is right, you sew the vertical seams over the basting, trim the seam allowances to about 1/4" then you turn the dress right side out and sew them again with a 1/4" seam allowance. That way the raw edges are fully enclosed and there's no chance of basted stitches showing on the outside.